|
 |
|
 |
|
| Author |
Message |
jargonking
Community Member
Joined: 08 Mar 2011
Posts: 65
|
 Posted: Sun Jan 27, 2013 3:39 pm Post subject: Posted: Sun Jan 27, 2013 3:39 pm Post subject: |
 |
|
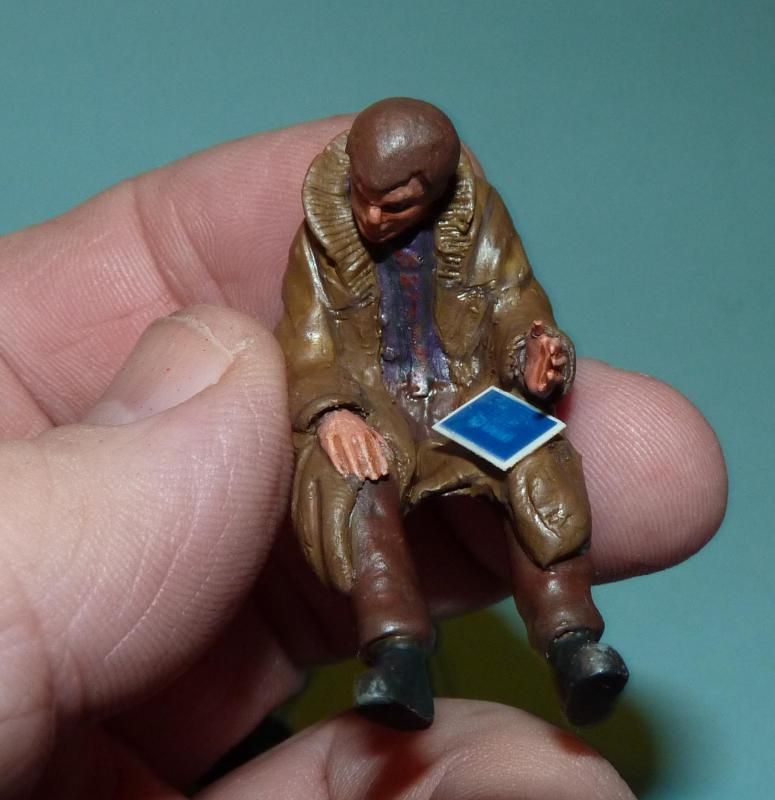
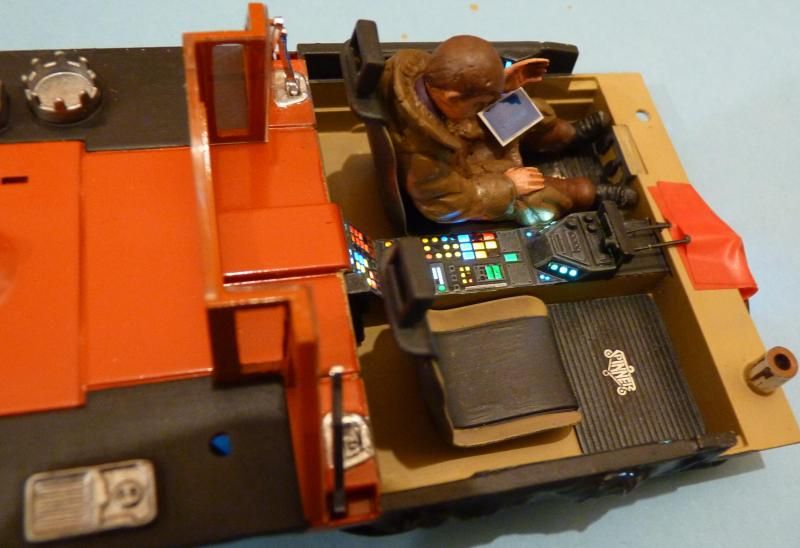
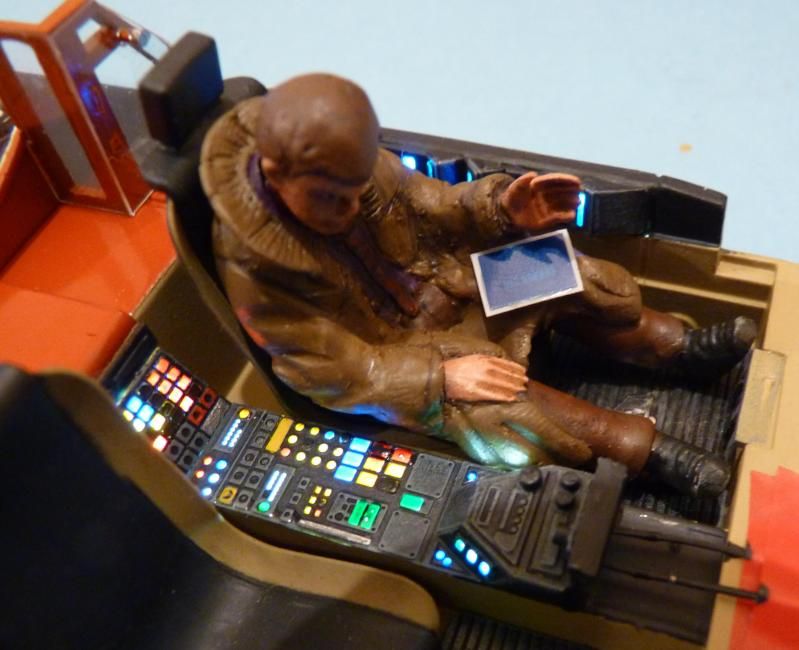
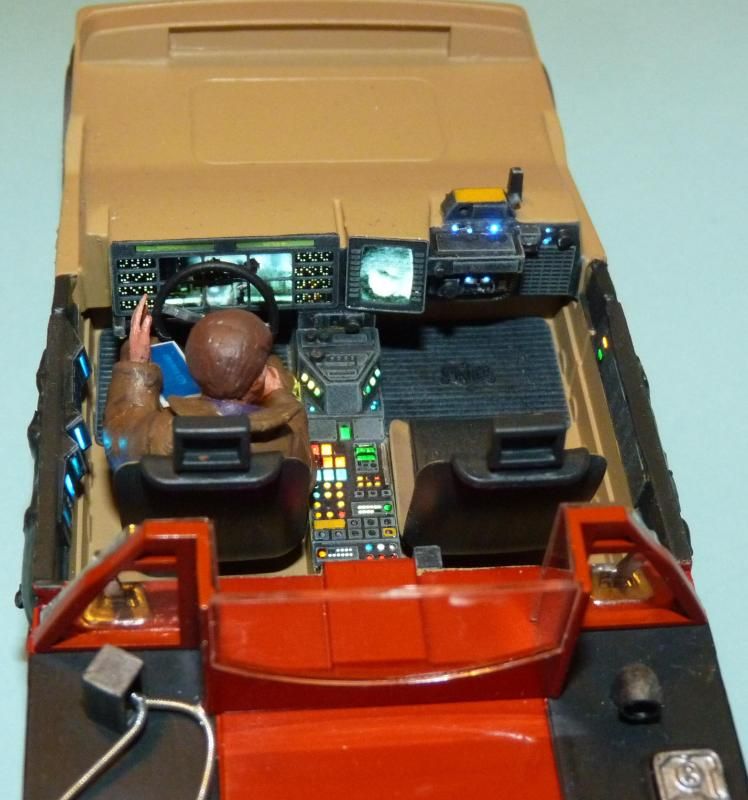
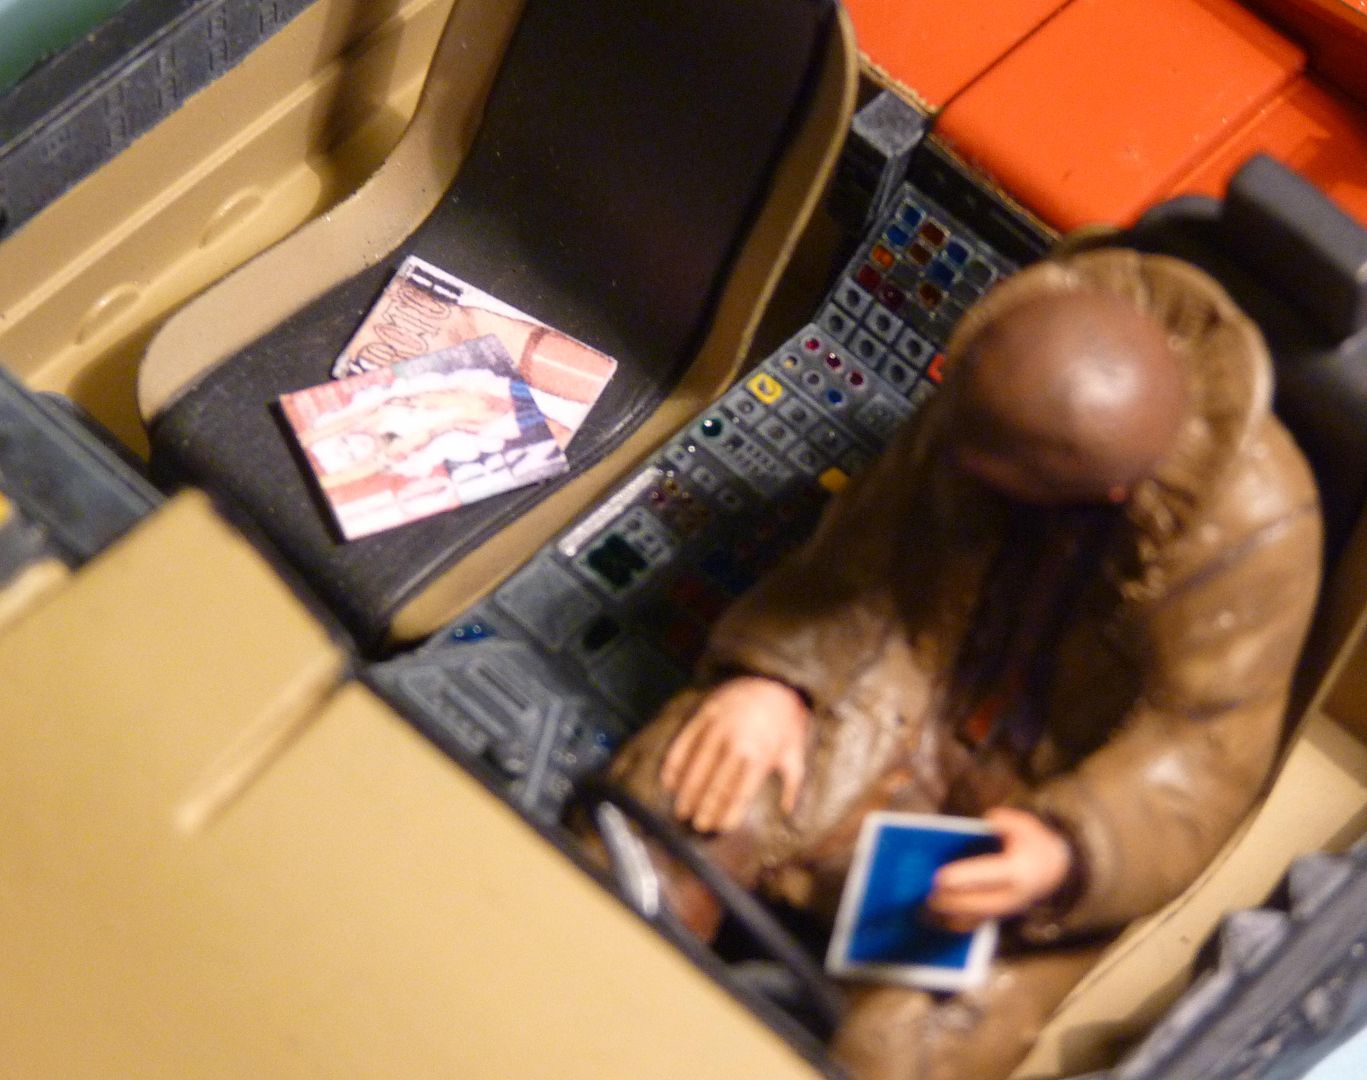
Well I've finished my Deckard figure off, I'm reasonably pleased with him considering figure sculpting is not my forte. The camera flash makes him appear shiny when in fact he is dead matt, here he is test fitted in the driving seat....
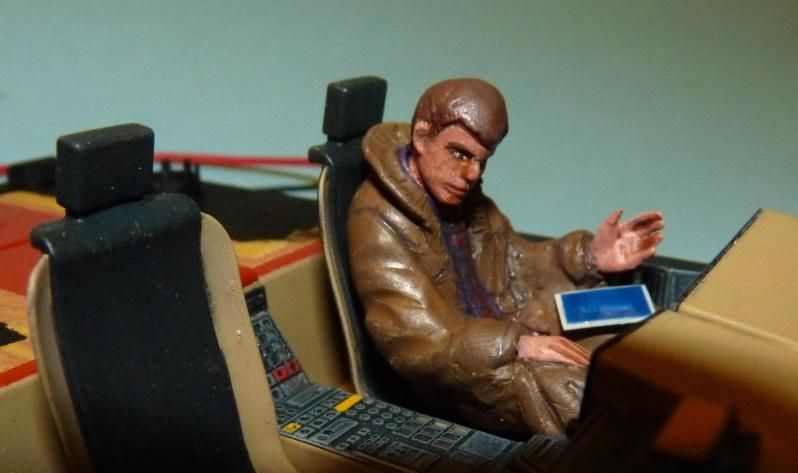
I gave him a sort of laptop made from a piece of styrene topped with an offcut of one of the spare slides from the upgrade set....
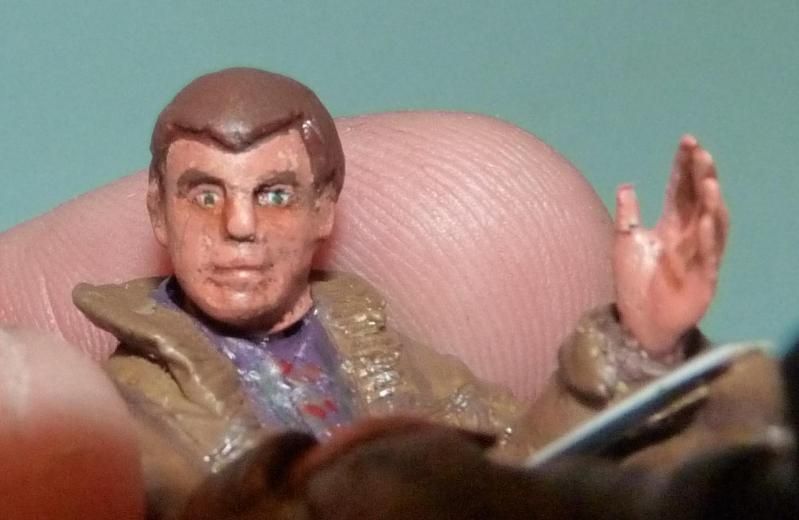
Close up he doesn't bear much resemblance to Harrison Ford, in fact in a strange way he looks more like Mark Hamill....anyway, once the body is on and the interior lit I think he'll look ok....
 |
|
| Back to top |
|
|
|
|
 |
|
 |
|
|
|
|
| Author |
Message |
jargonking
Community Member
Joined: 08 Mar 2011
Posts: 65
|
| Posted: Mon Jan 28, 2013 8:04 pm Post subject: |
|
|
A little more progress....
As well as giving you templates to cut out the missing windows in the rear bulkhead, the etched set also provides templates for cutting the 'glass' out of transparent sheet....

These were duly installed in the bulkhead along with the kit transparency and the whole assembly cemented in place....
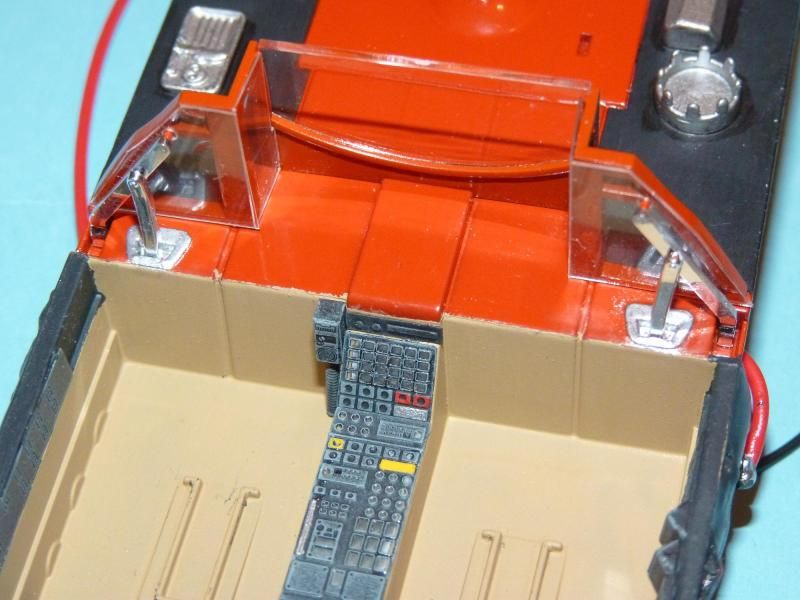
I also painted in the lights using Tamiya Clear colours...some of these require a second coat whilst others have been blacked out using dark grey paint...
Overall the effect is starting to look more convincing...now to tackle the rest of the kit... |
|
| Back to top |
|
|
|
|
|
|
|
|
|
|
|
| Author |
Message |
Bendzhamin1967
Community Member
Joined: 08 Nov 2009
Posts: 654
Location: Cinco Ranch, TEXAS
|
| Posted: Mon Jan 28, 2013 8:09 pm Post subject: |
|
|
this is simply kwel as hades
_________________
I've had people walk out on me before, but never when i was being so charming |
|
| Back to top |
|
|
|
|
|
|
|
|
|
|
|
| Author |
Message |
joberg
Community Member
.jpg)
Joined: 06 Oct 2008
Posts: 9447
|
| Posted: Tue Jan 29, 2013 7:44 am Post subject: |
|
|
You did well on the sculpt and, as you said, with the whole car completed you will not see the difference. As a matter of fact the light reflections of the instrument panels inside could give you a surprise or two in terms of looks  |
|
| Back to top |
|
|
|
|
|
|
|
|
|
|
|
| Author |
Message |
jargonking
Community Member
Joined: 08 Mar 2011
Posts: 65
|
| Posted: Sun Feb 03, 2013 5:49 pm Post subject: |
|
|
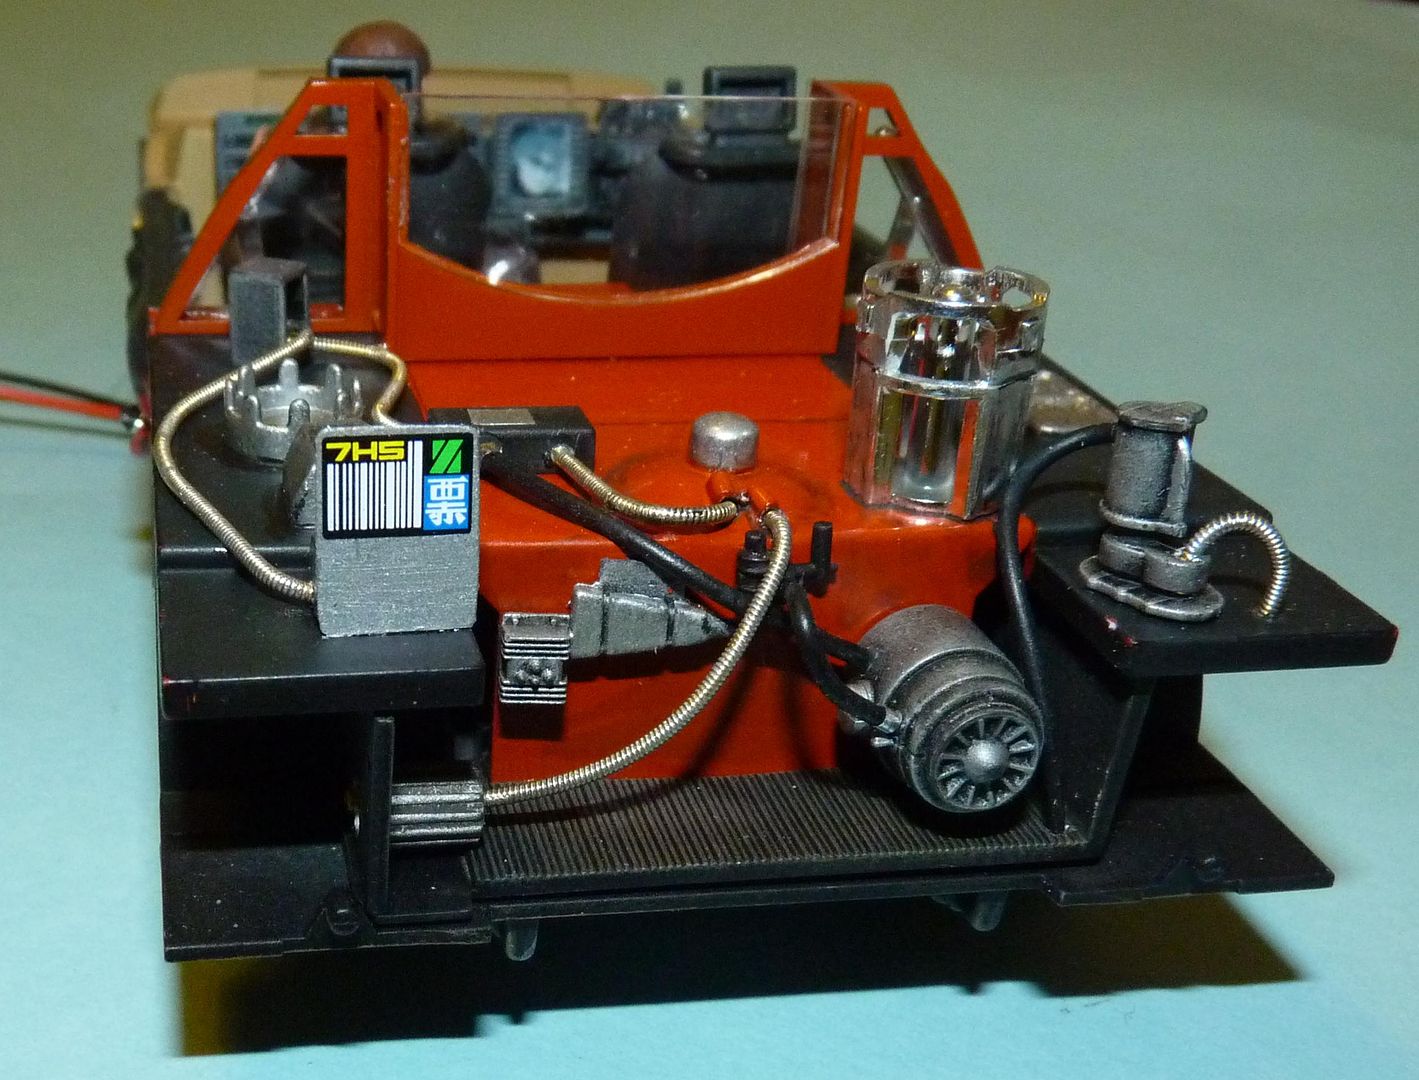
More progress....
I finally attached the dashboard to the interior tub and did the final wiring to leave just a single set of feeds. These are way overlength and feed out through the bottom of the chassis behind the rear wheel...they'll then feed through the base and on to the power supply. The whole interior assembly was then glued to the chassis.
I then added the various engine parts which had been pre-painted. These were then connected up using a mixture of the kit-supplied vinyl tubing, some slightly thicker black wire and some wire-wound guitar string to simulate the cables seen in the pics of the real vehicle.
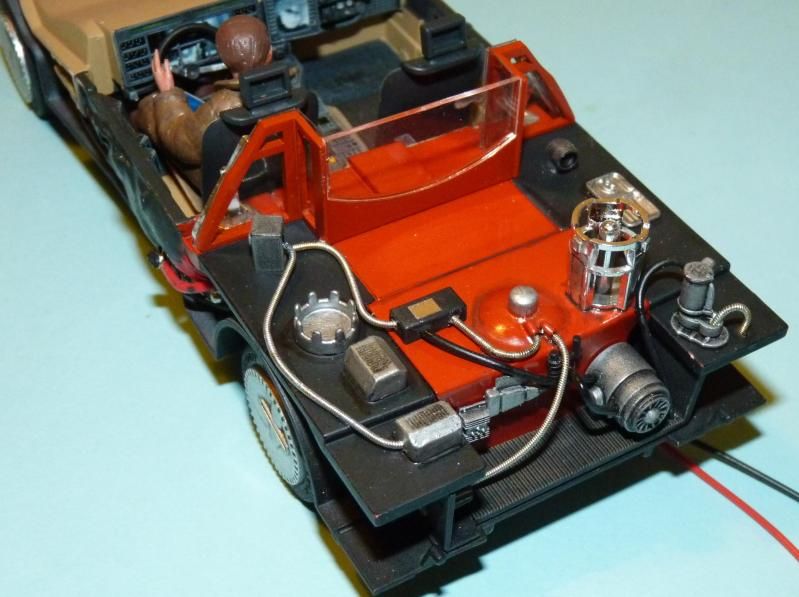


I'm going to add more weathering to the engine area using some washes and powdered pigments.
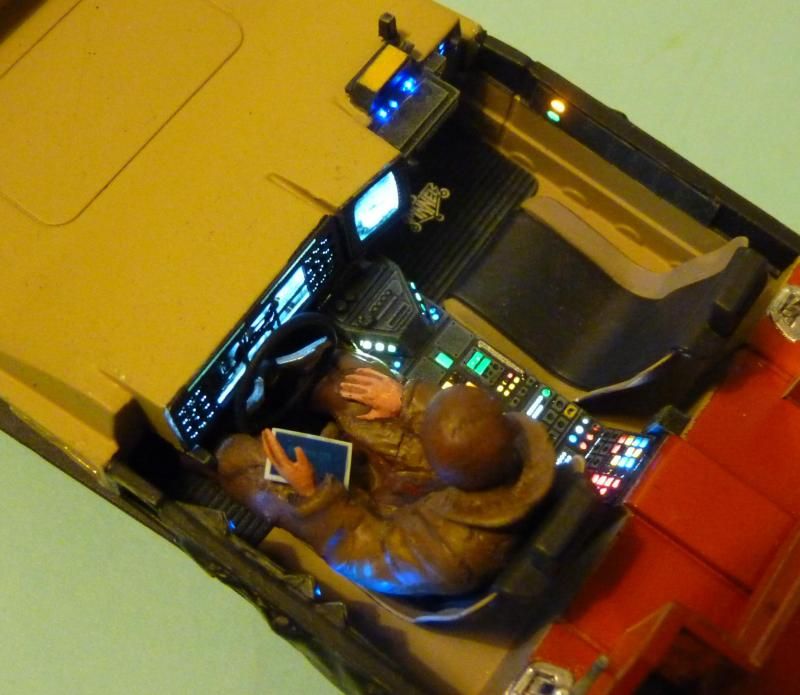
Here's a couple of views of the lights on the completed interior....I chose to mount the steering wheel with the spokes horizontal which is at odds with the instructions and also the real car but it means the screen displaying the spinner taking off is not obscured....
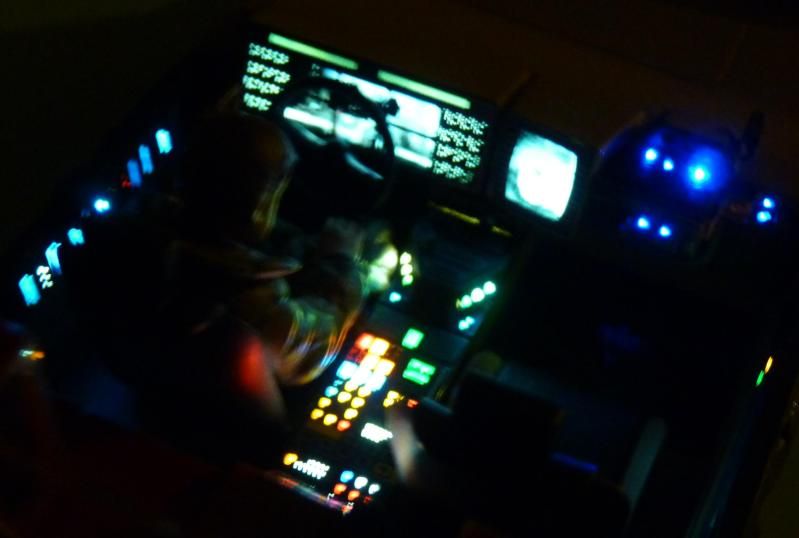
Finally, a slightly blurry shot of the interior in darkness showing just how bright those lights are.....
More soon.... |
|
| Back to top |
|
|
|
|
|
|
|
|
|
|
|
| Author |
Message |
joberg
Community Member
Joined: 06 Oct 2008
Posts: 9447
|
| Posted: Mon Feb 04, 2013 7:27 am Post subject: |
|
|
Perfect job...keep up the good work  |
|
| Back to top |
|
|
|
|
|
|
|
|
|
|
|
| Author |
Message |
Bendzhamin1967
Community Member
Joined: 08 Nov 2009
Posts: 654
Location: Cinco Ranch, TEXAS
|
| Posted: Mon Feb 04, 2013 5:42 pm Post subject: |
|
|
most awesome... 
_________________
I've had people walk out on me before, but never when i was being so charming |
|
| Back to top |
|
|
|
|
|
|
|
|
|
|
|
| Author |
Message |
Ki-Djowac
Community Member
Joined: 23 Feb 2012
Posts: 164
Location: Belgium
|
| Posted: Tue Feb 05, 2013 1:18 am Post subject: |
|
|
Amazing work there
Those lights are very clean and professional looking. Make the model come to life 
_________________
 |
|
| Back to top |
|
|
|
|
|
|
|
|
|
|
|
| Author |
Message |
jargonking
Community Member
Joined: 08 Mar 2011
Posts: 65
|
| Posted: Wed Feb 06, 2013 7:47 pm Post subject: |
|
|
Whilst building the engine deck I thought I'd install the license plate that Fujimi provide as a decal.
There doesn't appear to be any reference on the instruction sheet to it's placement which is odd given that it is the only accurate decal on the whole sheet.
The Miami Sedan has it as a sticker on the centre of the rear bodywork which looked wrong to me.
A trawl of the web found these two pics showing that it was actually mounted on a metal plate to the left side of the engine, high enough to be seen over the tail lights.
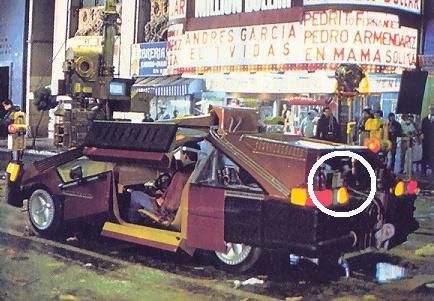

So I'll need to fabricate a suitable plate....also, as I'm depicting the scene of Deckard parked making the call to Pris, I'll need to illuminate the lights on the bumpers....eek!
Another odd thing I spotted was while watching the scene of Deckard driving into his apartment building....it's teeming with rain yet the wiper is stationary and there's no evidence it's been sweeping the windscreen at all....possibly the wipers were dummies as it maybe proved too difficult to get them to work? |
|
| Back to top |
|
|
|
|
|
|
|
|
|
|
|
| Author |
Message |
joberg
Community Member
Joined: 06 Oct 2008
Posts: 9447
|
| Posted: Thu Feb 07, 2013 7:49 am Post subject: |
|
|
| Good catch on the plate location! And yes, the wipers didn't work at all...I don't think Ridley was happy about that one; but the show had to go on and the rest is history |
|
| Back to top |
|
|
|
|
|
|
|
|
|
|
|
| Author |
Message |
Michael
Community Member
Joined: 09 Apr 2010
Posts: 15
|
| Posted: Thu Feb 07, 2013 9:08 am Post subject: |
|
|
| On the wipers not working, In the dangerous day documentary they explain that on that day of filming they couldn't get the wipers to work, ran out of time and had to shoot the scene. |
|
| Back to top |
|
|
|
|
|
|
|
|
|
|
|
| Author |
Message |
jargonking
Community Member
Joined: 08 Mar 2011
Posts: 65
|
| Posted: Sat Feb 09, 2013 1:38 pm Post subject: |
|
|
Getting close to finishing...still can't decide on lighting the rear lights...very little room even for SMD's and not much opportunity to hide the feeds....
Anyway, here's the rear license plate installed...
The only other decal to apply was the red/white circle on the roof....the decals are by Cartograf and respond well to Microsol. Still some touching in to do on the window rubbers....

Rear view....note the two pipes going into the 'intake' on the roof, these are closer to the real car and not how they are shown in the kit instructions. A light spirit wash was applied made up of used thinners and MIG 'Starship Filth' oil colour. The overall colour of the Sedan appears much redder in these pics than to the eye....I'll get some done in daylight once it's finished (and it's stopped raining!)
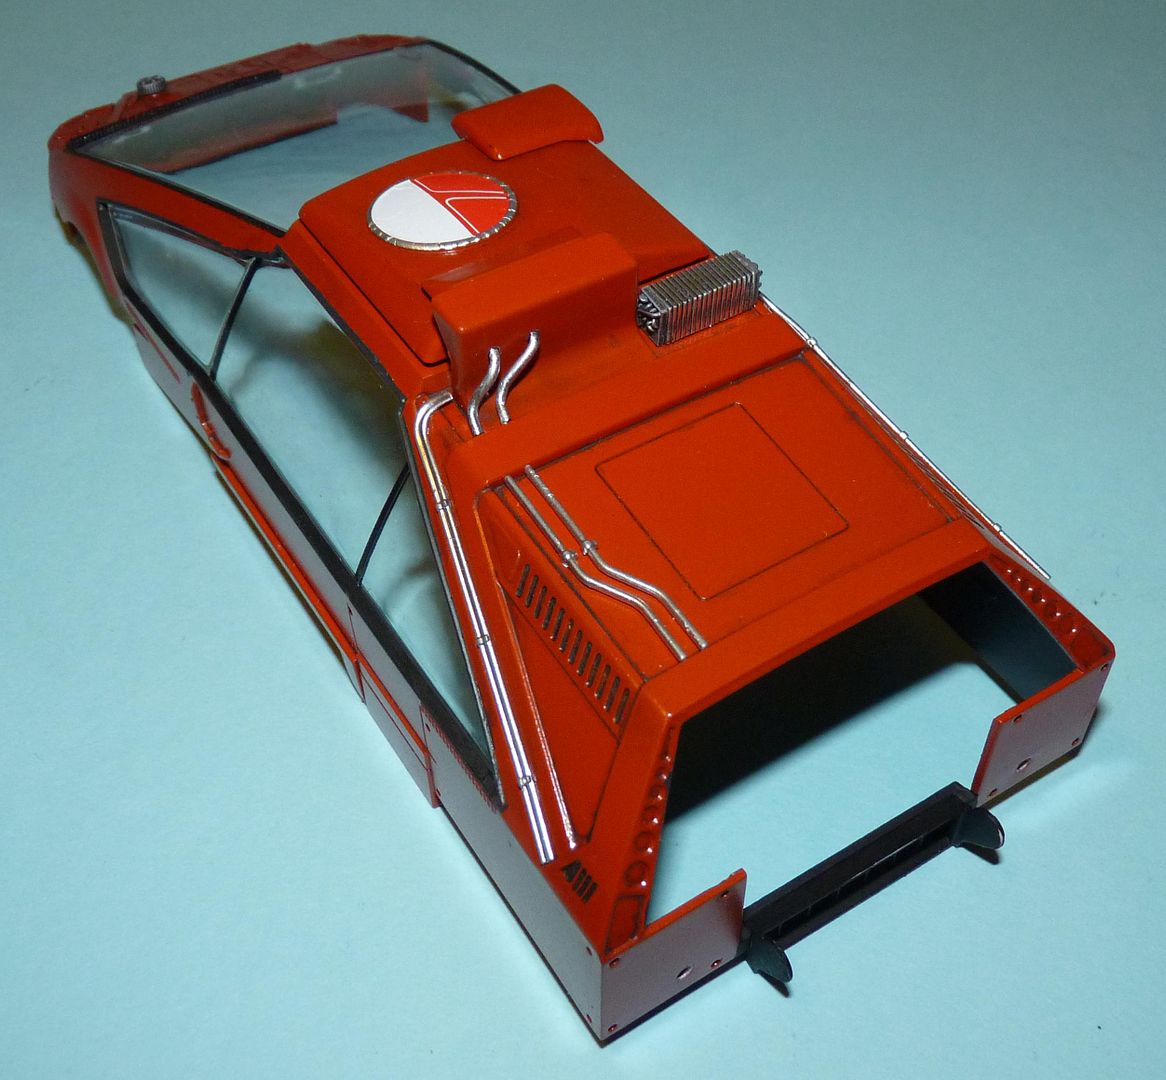
Nearly there..... |
|
| Back to top |
|
|
|
|
|
|
|
|
|
|
|
| Author |
Message |
joberg
Community Member
Joined: 06 Oct 2008
Posts: 9447
|
| Posted: Sat Feb 09, 2013 5:53 pm Post subject: |
|
|
| Nearly there indeed...love the build so far |
|
| Back to top |
|
|
|
|
|
|
|
|
|
|
|
| Author |
Message |
jargonking
Community Member
Joined: 08 Mar 2011
Posts: 65
|
| Posted: Sat Feb 09, 2013 7:01 pm Post subject: |
|
|
More scale insanity....the detail in Blade Runner is staggering...Ridley Scott went to the trouble of getting the art department to create magazines to populate a news stand which is barely glimpsed in the final film.
I thought it would be fun to have some of these on the passenger seat so found the images online and shrank them before printing them off. A copy of Finescale Modeller gave me the dimensions of a typical US magazine size....275mm x 210mm which equates to 11.46mm x 8.75mm at 1/24 scale.
Here's the finished articles...
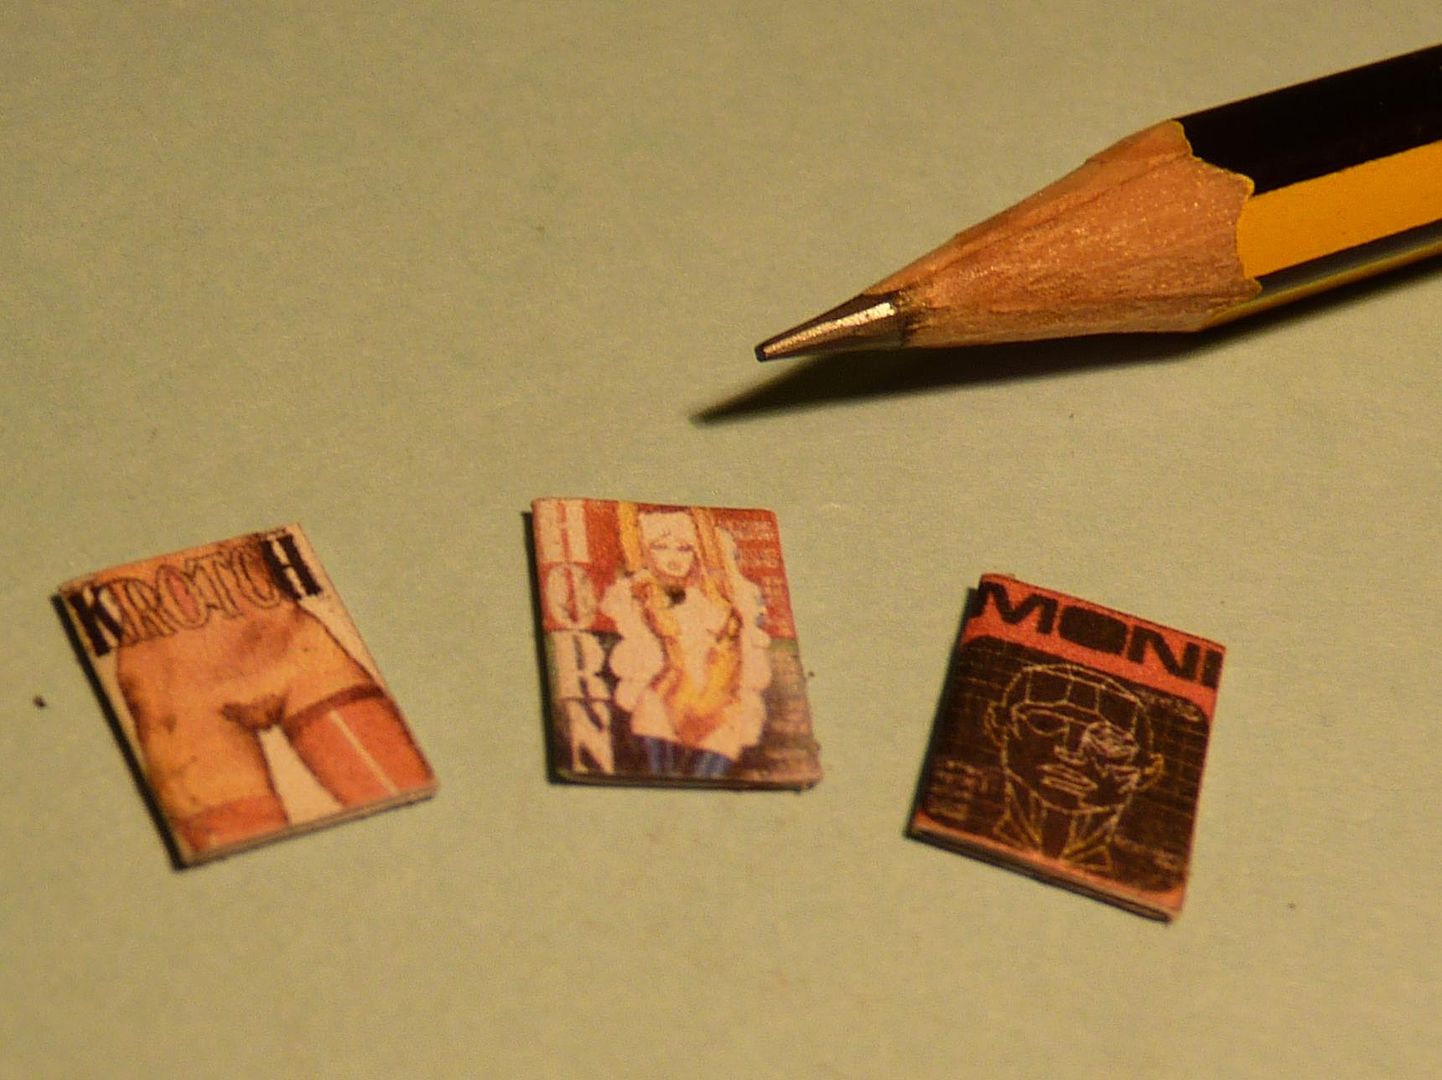
They have back covers too, not that you'll see them, featuring Japanese drinks adverts...note the Johnnie Walker ad which is a brand featured in the movie...

Here they are on the seat....
I'm now thinking he should have a briefcase too..... |
|
| Back to top |
|
|
|
|
|
|
|
|
|
|
|
| Author |
Message |
joberg
Community Member
Joined: 06 Oct 2008
Posts: 9447
|
| Posted: Sat Feb 09, 2013 8:58 pm Post subject: |
|
|
Good reading material for those long nights of surveillance
Great details on that one. Since you like the used look, are you going to do a type of "treatment" for the windshield, and other windows?
By that I mean the grime on the windshield and a clear glass on the whiper pass. |
|
| Back to top |
|
|
|
|
|
|
|
|
|
|
|
| Author |
Message |
jargonking
Community Member
Joined: 08 Mar 2011
Posts: 65
|
| Posted: Sun Feb 10, 2013 3:26 am Post subject: |
|
|
| I'll keep the side windows clean so as not to obscure the view of the lighting but I'm thinking of dirtying down the windscreen.... |
|
| Back to top |
|
|
|
|
|
|
|
|
|
|
|
| Author |
Message |
andy
Community Guide

Joined: 01 Nov 2006
Posts: 6237
Location: Rochester, NY
|
| Posted: Sun Feb 10, 2013 5:51 am Post subject: |
|
|
This just keeps getting better and better. Thank you for sharing this and taking the time to document it.
Andy |
|
| Back to top |
|
|
|
|
|
|
|
|
|
|
|
| Author |
Message |
jargonking
Community Member
Joined: 08 Mar 2011
Posts: 65
|
| Posted: Sun Feb 10, 2013 7:39 am Post subject: |
|
|
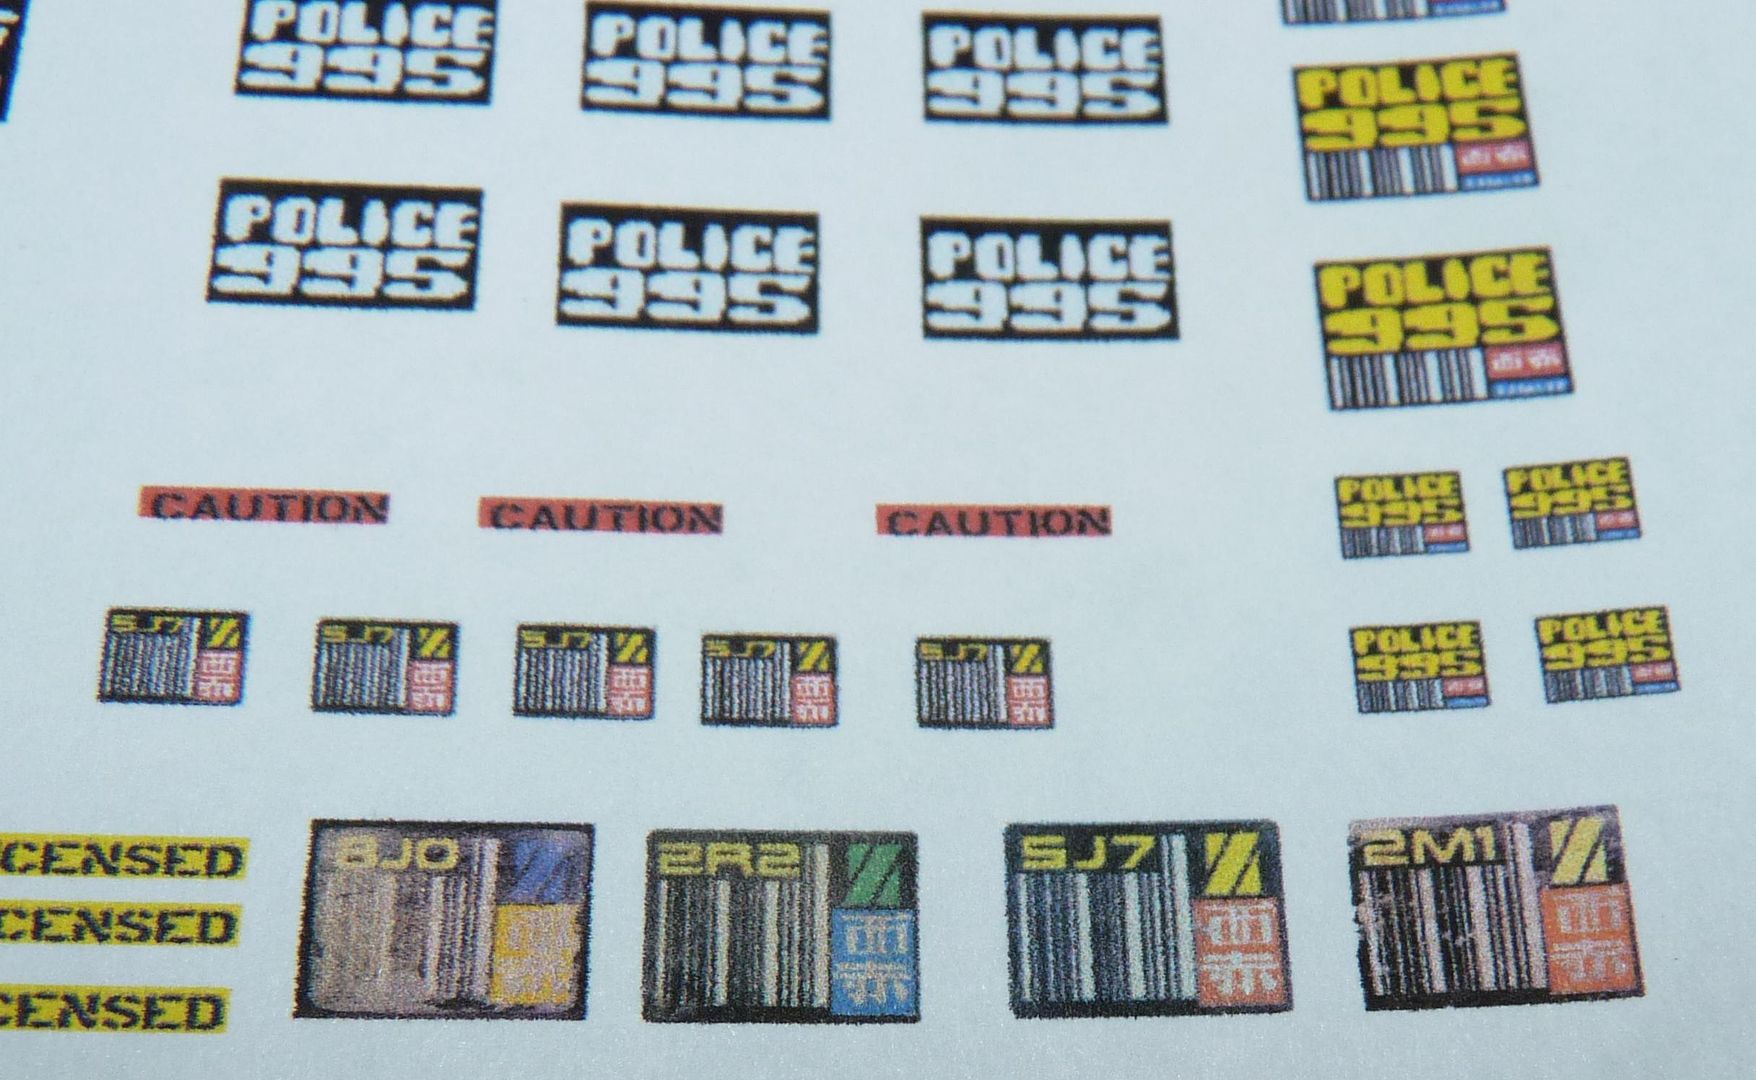
Another couple of hours at the computer resulted in an A4 sheet of generic decals to be used on upcoming projects, in particular a Police bike....

They were printed using a basic Canon printer onto clear decal paper and the quality is pretty decent...just have to remember that what appears white is in fact clear so they need to go on a white background....
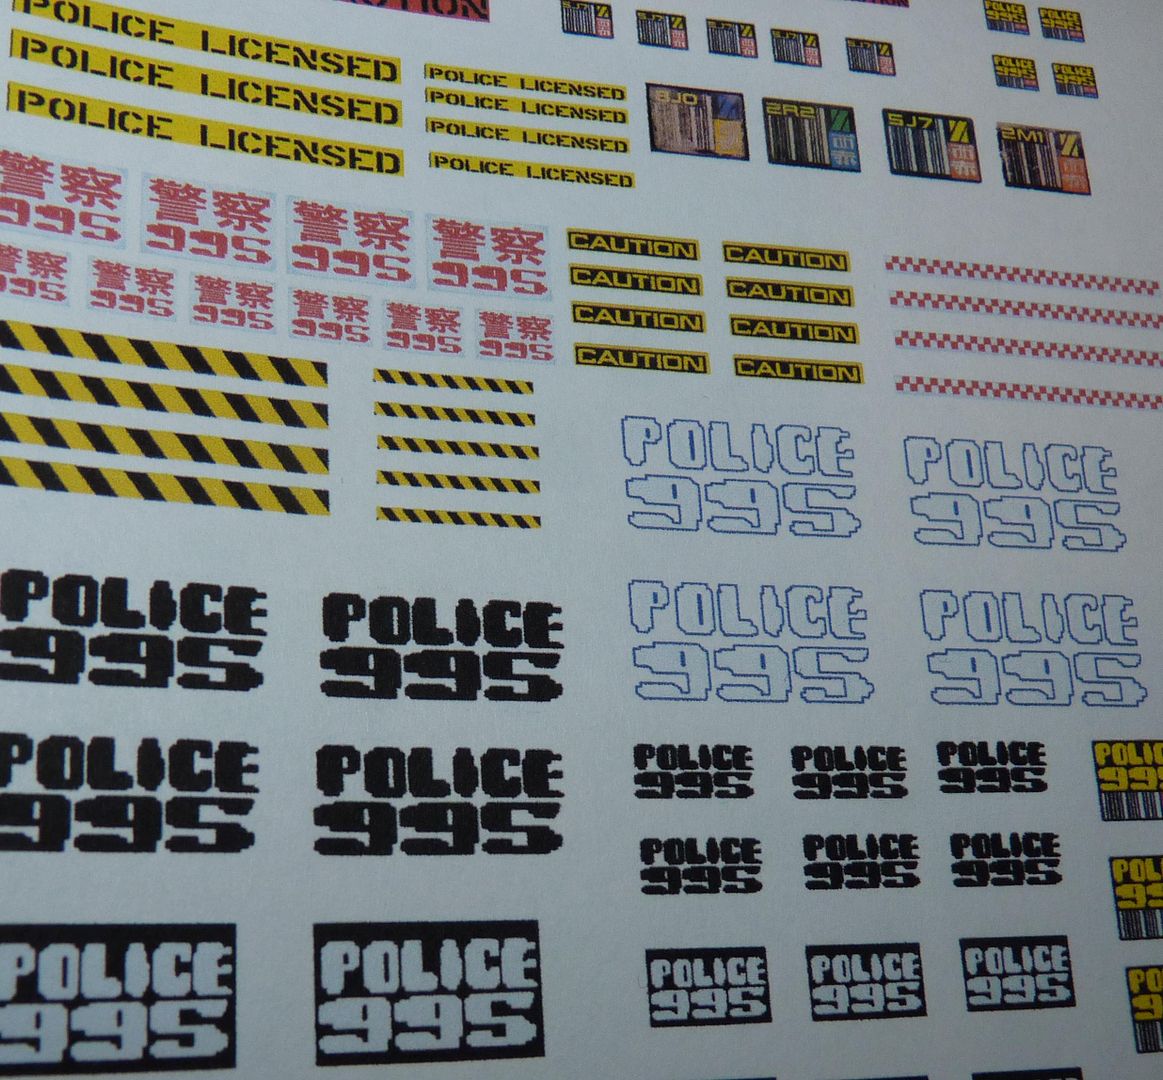
Here are some alternative license plates....
 |
|
| Back to top |
|
|
|
|
|
|
|
|
|
|
|
| Author |
Message |
joberg
Community Member
Joined: 06 Oct 2008
Posts: 9447
|
| Posted: Sun Feb 10, 2013 12:14 pm Post subject: |
|
|
| A Police bike Interesting... |
|
| Back to top |
|
|
|
|
|
|
|
|
|
|
|
| Author |
Message |
jargonking
Community Member
Joined: 08 Mar 2011
Posts: 65
|
| Posted: Thu Feb 14, 2013 4:26 pm Post subject: |
|
|
Fresh in today from Randy Cooper....a superb resin diorama base.....
This is it straight out of the box with no cleaning up....
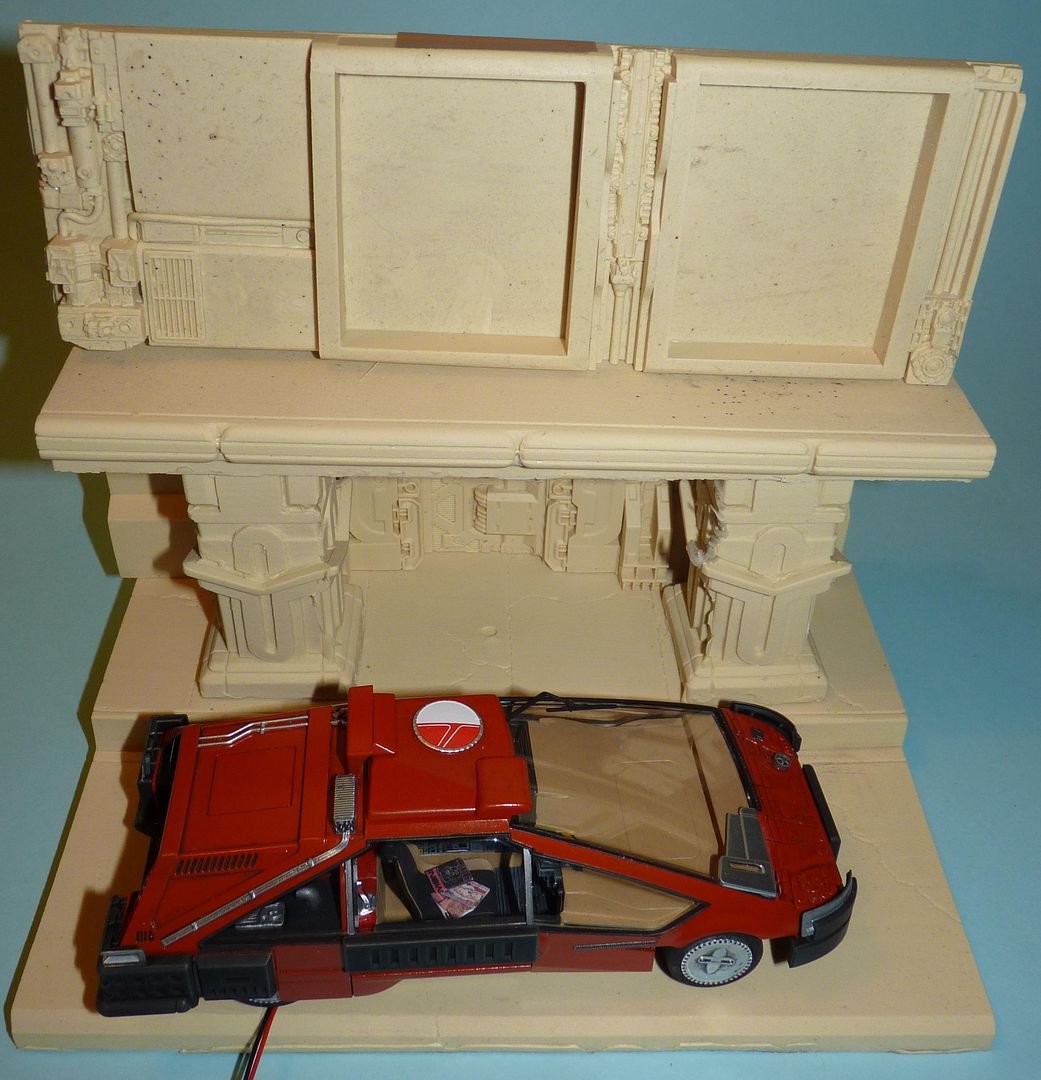
It's based on the building where Batty and Leon stand watching Deckard and Gaff search the apartment at 1187 Hunterwasser. The columns and door are really finely detailed and the parts extremely well cast...
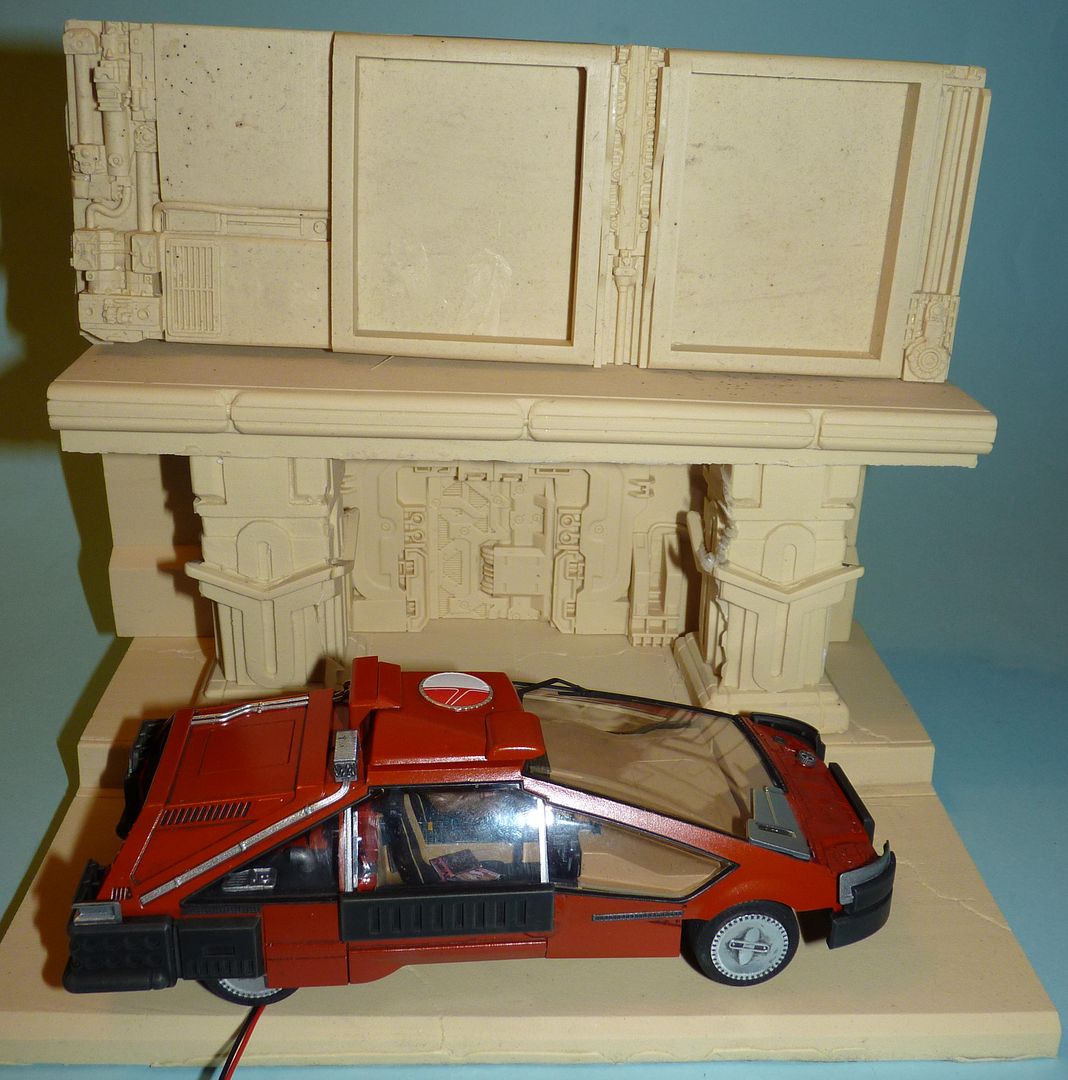
Close up of the doorway detailing...
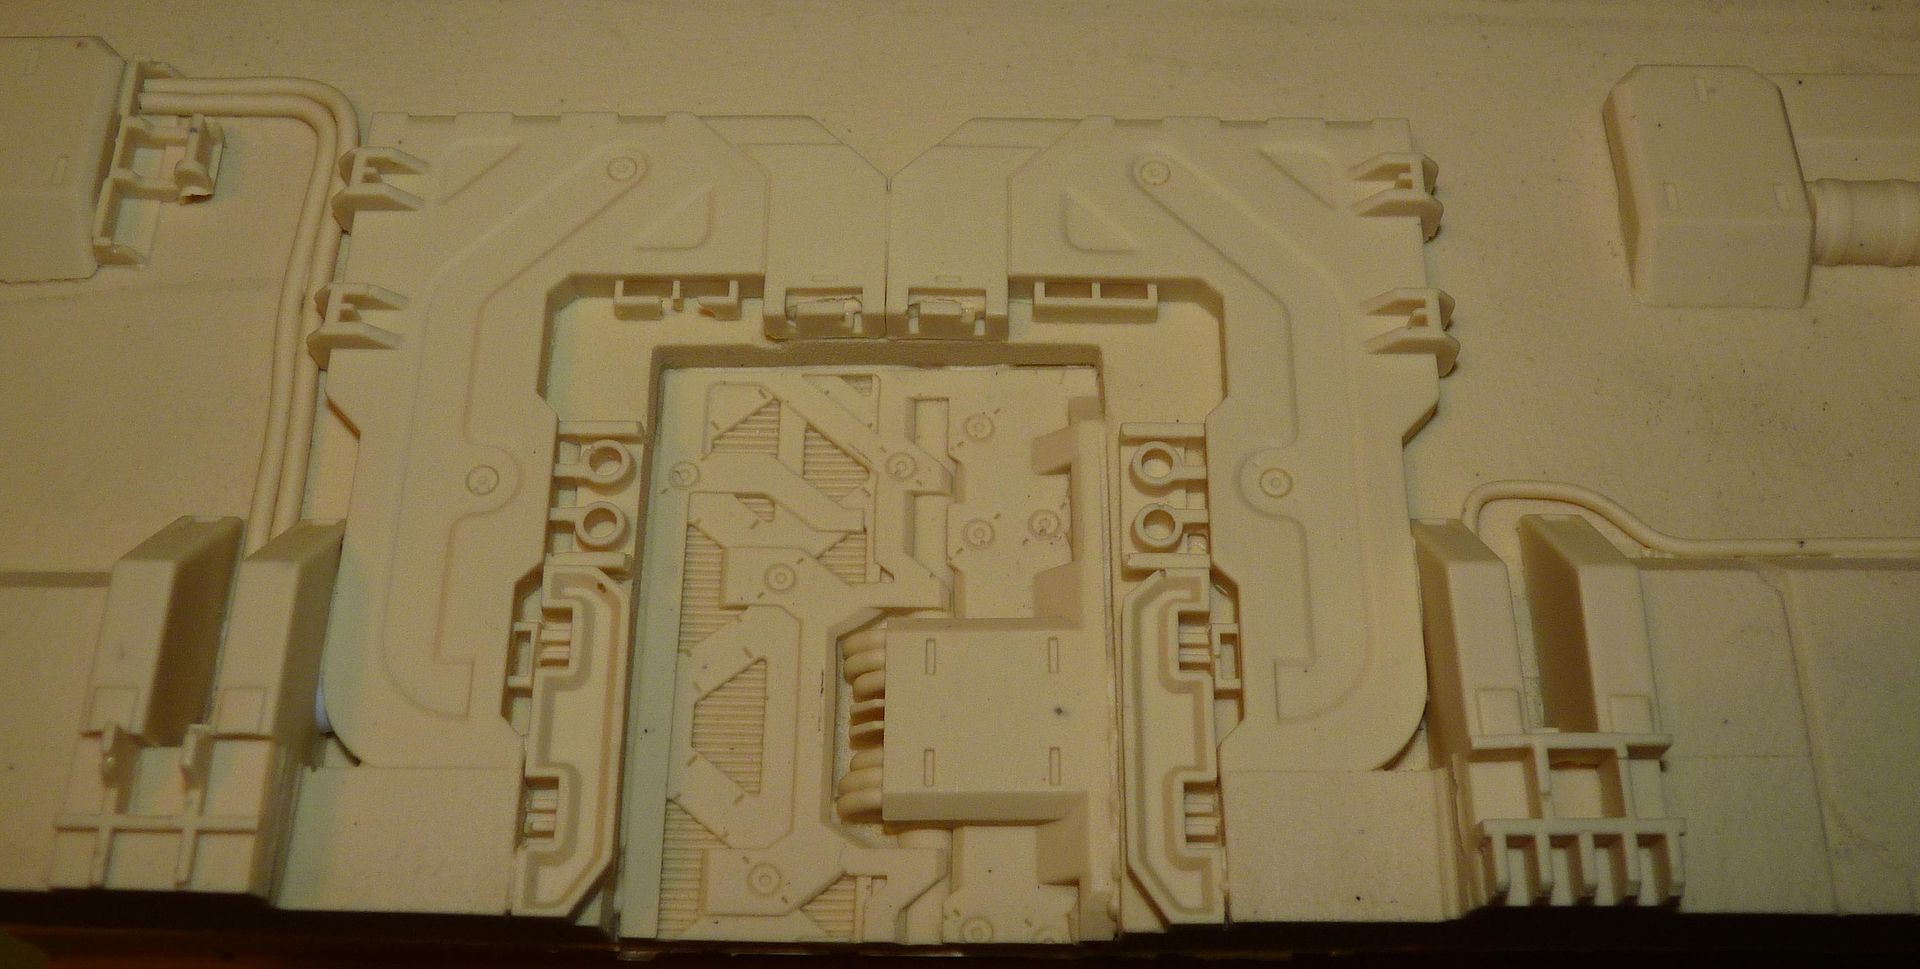
Detail on the pillar....
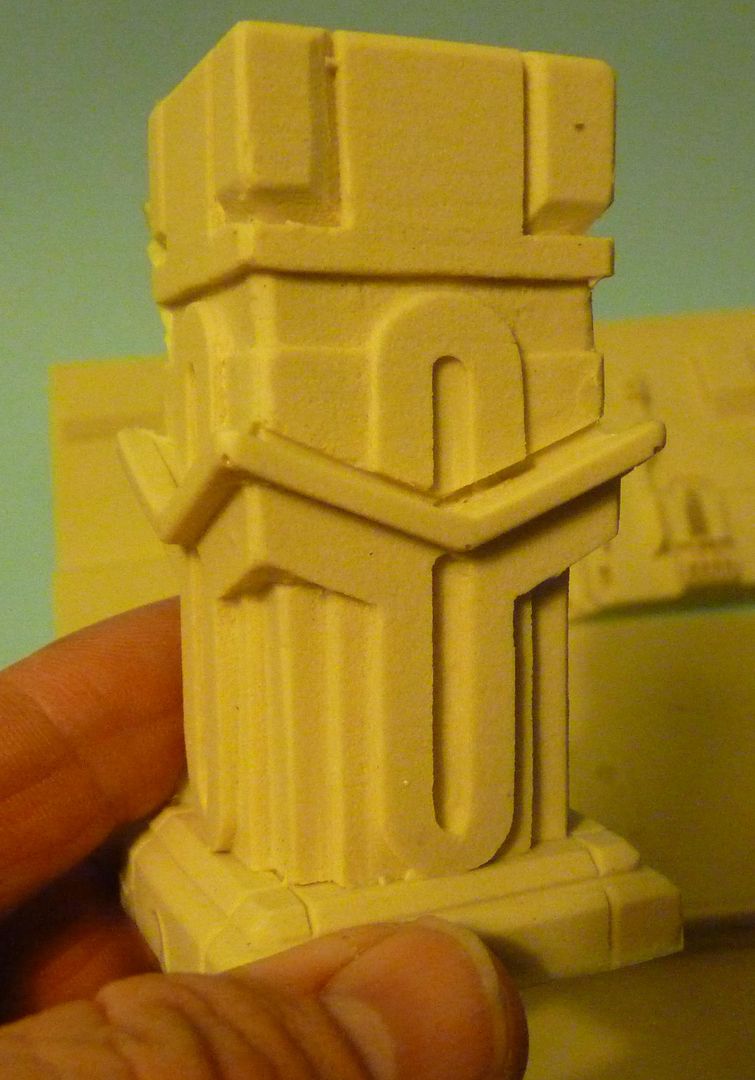
I'm intending to light the two large screens above the canopy and also add some lights to the door. I'm also going to extend the roadway out in front... |
|
| Back to top |
|
|
|
|
|
|
|
|
|
|
|
|
You cannot post new topics in this forum
You cannot reply to topics in this forum
You cannot edit your posts in this forum
You cannot delete your posts in this forum
You cannot vote in polls in this forum
|
|
|
|
|
|
|
|